bookmark_borderInstalling Incredible PBX from CrownPanel

Hello!

In this week’s feature highlight, we look at How to Install Incredible PBX from CrownPanel

  1. Open a Support Ticket with us requesting to add the Incredible PBX 2020 template to your account.
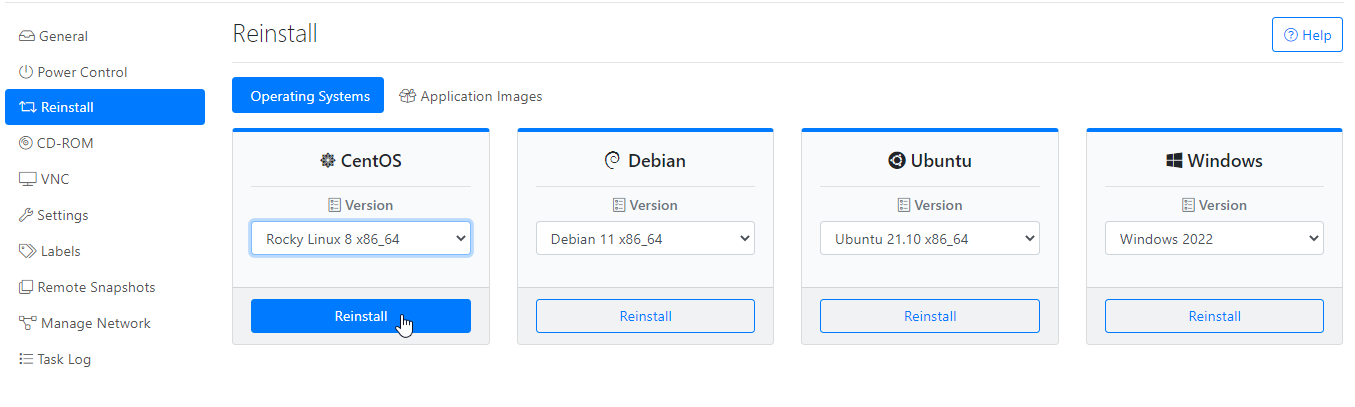
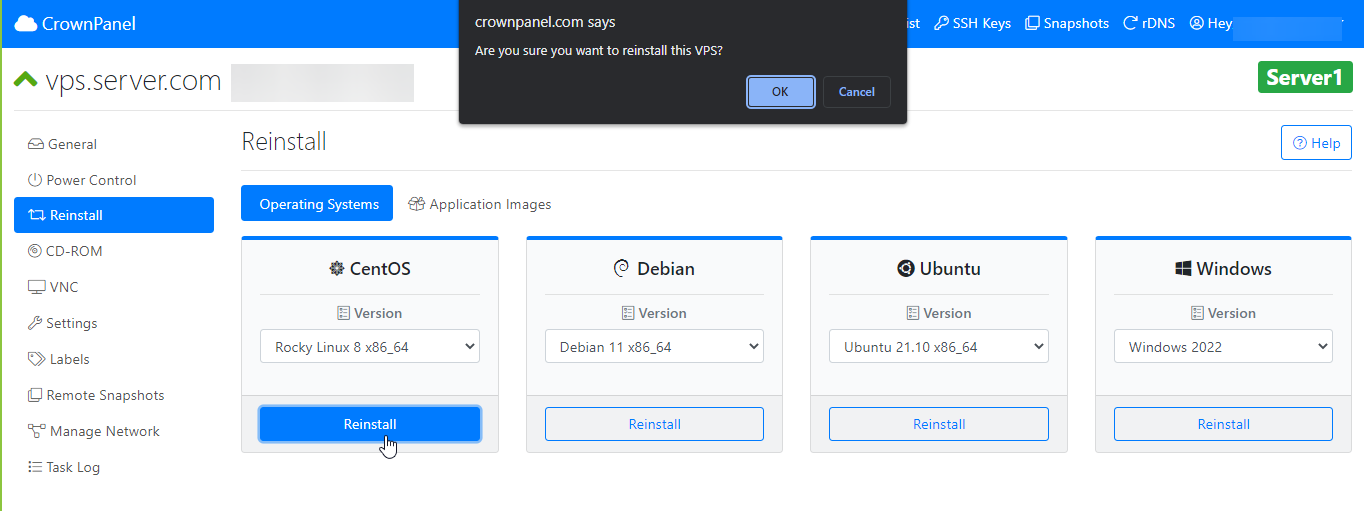
  2. IncrediblePBX can be installed with a 1-Click re-install option in the CrownPanel and you can find it under CentOS re-install option with the label incrediblepbx2020, for Instructions on how to re-install you can click here
  3. Next, SSH into the server to complete the remaining installation steps. It is an interactive process from here on and the system will prompt you for some inputs regarding the configuration.

NOTE: The first IP Address accessing the Incredible PBX server is whitelisted and required the same IP address to access the server again, we recommend you to use a VPN, or have a static IP configured on your local system to access the server remotely anytime.

Screenshots,

Once the installation process is completed you will be presented with a final configuration window

To access Incredible PBX Admin Panel

Open the browser and enter the following URL,

http://server-ip-address/

Login credentials,

  • Username – admin
  • Password – what you have set in Step 3[root password].

To access Incredible PBX Webmin

Open the browser and enter the following URL,

https://server-ip-address:9001

Login credentials,

  • Username – root
  • Password – what you have set in Step 3[root password].

This would conclude the installation IncrediblePBX on CrownPanel.

If you face technical difficulties, kindly reach out to us via Support Ticket.

bookmark_borderReinstalling your KVM VM on CrownPanel

Hello!

In this week’s feature highlight, we look at how to Reinstall your KVM VM on CrownPanel

First, Click on the “Manage” button beside the VM you wish to reinstall

First

Next, Switch to the “Reinstall” Tab

Second

Next, Select the Operating System you wish to install from the list,

Third

You can also reinstall your VM via the CD-ROM method if you wish to create custom partitions and/or wish to install a custom operating system

Once you confirm the reinstall, you’ll be presented with your new root password (if installing a Linux based operating system)

Fourth

bookmark_borderChanging your VPS Hostname on CrownPanel

Hello!

In this week’s feature highlight, we look at how to change the Hostname of your VPS on CrownPanel.

Before learning How to set the Hostname in CrownPanel, let us learn what is a Hostname.

A hostname is a domain name assigned to a host computer. For example, if Computer “A” had two computers on its network named “A1” and “A2,” the domain name “A1.abc.com” is connecting to the “A1” computer.
A hostname may have appended the name of a Domain Name System (DNS) domain, separated from the host-specific label by a period (“dot”) then the hostname is said to be a fully qualified domain name (FQDN).

OpenVZ Based VPS

OpenVZ VPSes pull the hostname from the config file which is updated when setting the hostname via our panel

Login to https://crownpanel.com/ and click on the “Manage” button beside the VPS you wish to edit the hostname for.

Next click on the “Hostname” listed beside the IP address,

This will open a new form where you can edit the hostname as you wish. Once the hostname is edited/changed, the VPS hostname is updated.

KVM Based VPS

Click on the “Manage” button beside the VPS you wish to edit the hostname for.

Next click on the “Hostname” listed beside the IP address,

This will open a new form where you can edit the hostname as you wish. Once the hostname is edited/changed, the VPS hostname is updated.

CentOS

How do I see the Host names?

hostnamectl

OR

hostnamectl status

How do I set the Host name? The new hostname can be set with the following command,

hostnamectl set-hostname YourHostname --static

To set Hostname as “myvps”, enter:

hostnamectl set-hostname myvps --static

To verify the new hostname, enter:

hostnamectl status

Ubuntu / Debian

Check your hostname status first:

hostnamectl status

Output shown will be something like:

[root@idroot ~]# hostnamectl status
Static hostname: vps.server.com
" 
"
"
Architecture: x86_64

To change the hostname to your preferred hostname, replace “YOUR_PREFERRED_HOSTNAME” with your hostname,

hostnamectl set-hostname YOUR_PREFERRED_HOSTNAME

Check your hostname status again in a new terminal:

hostnamectl status    

bookmark_borderAnnouncing AMD Ryzen 9 powered SSD VPS Now Available!

Greetings,

We’re happy to announce a brand new SSD KVM product line powered by the AMD Ryzen 9 3000 series processors, these are some of the fastest CPUs available on the market with impressive single and multi-core benchmark scores which help improve overall application performance.

To start off with, we have our new plans available at Atlanta, Georgia, USA (US-East), in the coming weeks, we will focus on expanding these offerings to our other datacenter locations as well. Please feel free to contact our support team to register any interest in these plans at our other locations.                                                                     

Our new Ryzen 9 3000 series powered plans start at a base price of $7/month (annual payment discounts available!),

The plans include the following, 

  • AMD Ryzen 9 3000 series processor
  • SSD powered storage for fast disk performance
  • Control Panel to manage the operation of your VPS (boot/shutdown/reboot/reinstall and much more!)
  • 1 Dedicated IPv4 and /64 IPv6 Subnet.
  • The ability to upgrade your existing plan easily at any time.
  • rDNS support included for both IPv4 and IPv6.
  • 1 Gbit/sec uplink on all nodes for fast network transfer.
  • 1 Free Snapshot Slot (user can create/restore snapshot via the control panel at any time)
  • In-House 24×7 Support.

To check out our new AMD Ryzen powered plans visit our website at – Click here

At the same time, we remain open to custom plans on this new platform, if you have a custom RAM/HDD/Bandwidth/CPU Core requirement, please feel free to contact our support team via the client-area or at support@crowncloud.net and we’ll do our best to create a plan tailored to your requirement. 

Stay tuned for further updates!

Follow us on CrownCloud BlogTwitter, and Facebook for updates regarding current offers and other updates.