bookmark_borderInstalling Rust on Debian 12

Hello,

In this week’s feature highlight, we look at How to Install Rust on Debian 12
Rust is a multi-paradigm, general-purpose programming language that emphasizes performance, type safety, and concurrency. It enforces memory safety—ensuring that all references point to valid memory—without requiring the use of a garbage collector or reference counting present in other memory-safe languages.

Install Rust

Install the Rust using rustup command line tool,

Run the below command to install curl and then download the rustup command,

apt install curl -y
curl --proto '=https' --tlsv1.3 https://sh.rustup.rs -sSf | sh

Output:

root@vps:~# curl --proto '=https' --tlsv1.3 https://sh.rustup.rs -sSf | sh
info: downloading installer

Welcome to Rust!

This will download and install the official compiler for the Rust
programming language, and its package manager, Cargo.

Rustup metadata and toolchains will be installed into the Rustup
home directory, located at:

  /root/.rustup

This can be modified with the RUSTUP_HOME environment variable.

The Cargo home directory is located at:

  /root/.cargo

This can be modified with the CARGO_HOME environment variable.

The cargo, rustc, rustup and other commands will be added to
Cargo's bin directory, located at:

  /root/.cargo/bin

This path will then be added to your PATH environment variable by
modifying the profile files located at:

  /root/.profile
  /root/.bashrc

You can uninstall at any time with rustup self uninstall and
these changes will be reverted.

Current installation options:

   default host triple: x86_64-unknown-linux-gnu
     default toolchain: stable (default)
               profile: default
  modify PATH variable: yes

1) Proceed with installation (default)
2) Customize installation
3) Cancel installation
>
info: profile set to 'default'
info: default host triple is x86_64-unknown-linux-gnu

Run the below command to add the Rust toolchain directory to the PATH environment variable,

source "$HOME/.cargo/env"

Verify the Installation

Verify the Rust installation by requesting the version,

rustc --version

Output:

root@vps:~# rustc --version
rustc 1.71.1 (eb26296b5 2023-08-03)
root@vps:~# 

Installing a Compiler

First, update the Apt package index using below command,

apt update

apt upgrade 

Once the upgrades are complete, install the build-essential package using the below command,

apt install build-essential

Creating, Compiling, and Running a Test Program, Start by creating some directories to store the test script,

mkdir ~/rustprojects
cd ~/rustprojects
mkdir testdir
cd testdir

Create a file in testdir to store your Rust code,

nano test.rs

Note: You need to use the .rs extension for all your Rust programs.

Add the following code into test.rs and save the file,

fn main() {
    println!("Congratulations! You have installed your Rust program and it works.");
}

Compile the code using the rustc command,

rustc test.rs

Run the resulting executable,

./test

Output:

root@vps:~/rustprojects/testdir# ./test
Congratulations! You have installed your Rust program and it works.
root@vps:~/rustprojects/testdir# 

Use the below command to update the rustup,

rustup update

Output:

root@vps:~/rustprojects/testdir# rustup update

info: syncing channel updates for 'stable-x86_64-unknown-linux-gnu'
info: checking for self-update

  stable-x86_64-unknown-linux-gnu unchanged - rustc 1.71.1 (eb26296b5 2023-08-03)

info: cleaning up downloads & tmp directories
root@vps:~/rustprojects/testdir# 

Done, you’ve installed and tested out Rust on Debian 12.

bookmark_borderInstalling WordPress with LAMP Stack on Debian 12

Hello,

In this week’s feature highlight, we look at How to Install WordPress with LAMP Stack on Debian 12

WordPress is one of the most popular website-building tools available out there. It is a simple way to get your online presence and perfect for those who do not know how to code and want a simple and effective way to share and build your story on the internet.

Prerequisites:

Creating Database

Setup the database so the WordPress can store in all the information. Log in to MariaDB as root user.

In this, we will create a Database, User and provide all kinds of privileges of managing the specific database to the user.

mysql -u root -p

output:

root@vps:~# mysql -u root -p
Enter password: 
Welcome to the MariaDB monitor.  Commands end with ; or \g.
Your MariaDB connection id is 15

Now, create your WordPress database. We’re creating it with wp_database as an example, but you can name it related to the website you’re going to host.

CREATE DATABASE wp_database;

output:

MariaDB [(none)]> CREATE DATABASE wp_database;
Query OK, 1 row affected (0.00 sec)    

Create a regular user for WordPress.

CREATE USER 'wpuser'@'localhost' IDENTIFIED BY 'StrongPassword';

Replace StrongPassword with an actual strong password.

output:

MariaDB [(none)]> CREATE USER 'wpuser'@'localhost' IDENTIFIED BY 'password';
Query OK, 0 rows affected (0.00 sec)

Finally, grant the new user all the privileges for the database wp_database.

GRANT ALL ON `wp_database`.* TO `wpuser`@`localhost`;

output:

MariaDB [(none)]> GRANT ALL ON `wp_database`.* TO `wpuser`@`localhost`;
Query OK, 0 rows affected (0.00 sec)

Flush your privileges and exit.

FLUSH PRIVILEGES;
EXIT;

output:

MariaDB [(none)]> FLUSH PRIVILEGES;
Query OK, 0 rows affected (0.00 sec)

Download And Unzip WordPress

Visit the official WordPress site to get to know the latest version available for download and also for more information on requirements of the server.

You can also use the below URL link to download the latest version at any given time.

cd /tmp
wget https://wordpress.org/latest.tar.gz

Unzip the downloaded WordPress file.

tar xpf latest.tar.gz

The resulting folder will be wordpress. It contains the entire WordPress install. How and where you copy it is entirely up to you and depends on your web server configuration

mkdir /var/www/wordpress

cp -R wordpress/* /var/www/wordpress/

Ofcourse, you can create the directory with the name of your choice or the name of the website.

Change the permissions and ownership to improve security and grant your webserver proper access.

chown -R www-data:www-data /var/www/wordpress

find /var/www/wordpress -type d -exec chmod 755 {} \;

find /var/www/wordpress -type f -exec chmod 644 {} \;

Create a Apache vHost

Using your favourite editor, we will create a config file in /etc/apache2/sites-available.

The config file can be the name of the website but it has to end with a .conf file extension.

We’re using nano for adding the configuration :

nano /etc/apache2/sites-available/wordpress.conf

Add in the below contents:

<VirtualHost *:80>
    ServerName example.com
    # ServerAlias www.example.com
    ServerAdmin webmaster@example.com
    DocumentRoot /var/www/wordpress

    <Directory /var/www/wordpress>
        Options -Indexes +FollowSymLinks
        AllowOverride All
    </Directory>

    ErrorLog ${APACHE_LOG_DIR}/wordpress-error.log
    CustomLog ${APACHE_LOG_DIR}/wordpress-access.log combined
</VirtualHost>

Replace example.com with your actual domain name.

Next, we’ll have to create a symbolic link, so the config file is available in sites-enabled as well.

ln -s /etc/apache2/sites-available/wordpress.conf /etc/apache2/sites-enabled/

Enable the new configuration,

a2ensite wordpress.conf

Test the configuration for any typos and syntax errors,

apachectl configtest

Once you get Syntax OK, restart apache web server for the changes to go live.

systemctl restart apache2

Open up a web browser and navigate to the domain name,

http://example.com

images

Start a WordPress installation by clicking on the Run the installation button.

images

Provide the requested information.

images

Once WordPress has been installed log in with your new user credentials.

images
images
images

This concludes our topic of setting up WordPress with LAMP stack on a Debian 12 system.

bookmark_borderHow to Install Matomo with LAMP Stack on Debian 12

Hello,

In this week’s feature highlight, we look at How to Install Matomo with LAMP Stack on Debian 12

Matomo, formerly Piwik, is a free and open-source web analytics application developed by a team of international developers, that runs on a PHP/MySQL webserver. It tracks online visits to one or more websites and displays reports on these visits for analysis. In this article, we are going to learn how to install Matomo on Ubuntu 22.04. So, let’s get started.

Checkout the Matomo Project Here.

Try this wiki on our VPS. Starting at just $5/month with 24×7 In-house customer support.

Pre-requisites :

  • A system with Debian 12 installed and running.
  • root access to the system.
  • LAMP Stack installed and running, for this, you can refer to one of our guides on installing the LAMP Stack (Apache, MariaDB, and PHP).

Once you’re all set, we’ll proceed with Matomo installation and configuration.

Create Database

Let us begin with creating a Database and a user. We will then grant the required privileges to the user so it can interact with the Database.

mysql -u root

CREATE DATABASE matomo_db;

CREATE USER 'matomo_user'@'localhost' IDENTIFIED BY 'YOUR-PASSWORD-HERE';

GRANT ALL PRIVILEGES ON matomo_db.* TO 'matomo_user'@'localhost';

FLUSH PRIVILEGES;

QUIT

The above commands will give complete access to the user matomo_user. Replace YOUR-PASSWORD-HERE with a safe and secure password.

Install Let’s Encrypt SSL Certificate

Let’s issue an SSL certificate for the domain for this we will need a snap package for Debian operating system.

We will update and install the snap package on the system:

apt update

apt install -y snapd

snap install core && sudo snap refresh core

Next, with the help of snap, we will install the certbot client which is used to create Let’s Encrypt certificates:

snap install --classic certbot

ln -s /snap/bin/certbot /usr/bin/certbot

Install SSL Certificate

Use the certbot command to issue a Let’s Encrypt certificate. The command will auto-detect the domains available or configured in the vHost configuration:

certbot --apache

Download Matomo

Download Matomo from official website : Click here.

Install the unzip package by following command

apt install unzip

cd /var/www/

wget https://builds.matomo.org/matomo.zip && unzip matomo.zip

rm matomo.zip

cd matomo

mkdir tmp

Setting up File Permissions

Let’s make the folders readable.

chown -R www-data:www-data /var/www/matomo

chmod -R 755 /var/www/matomo

Configuring Apache vHost

Create a new apache configuration file dev.domainhere.info.conf for the domain with the following command:

vi /etc/apache2/sites-available/dev.domainhere.info.conf

Add the following codes:

<VirtualHost *:80>

ServerName dev.domainhere.info
ServerAlias dev.domainhere.info
ServerAdmin admin@dev.domainhere.info
DocumentRoot /var/www/matomo

ErrorLog ${APACHE_LOG_DIR}/dev.domainhere.info_error.log
CustomLog ${APACHE_LOG_DIR}/dev.domainhere.info_access.log combined

<Directory /var/www/matomo/>
Options FollowSymlinks
AllowOverride All
Require all granted
</Directory>

</VirtualHost>

Change dev.domainhere.info with your actual Domain Name.

Now, press the Esc key, and type :wq! and press the Enter key to save and exit the file.

Edit the PHP config filephp.ini using nano or vi,

nano /etc/php/8.1/apache2/php.ini

Add the following lines at the end of the file,

extension=mysqli.so
extension=pdo.so
extension=pdo_mysql.so

Save and exit the file.

Disable the defafult configuration and enable the new site configuration using the following command,

a2dissite 000-default.conf

a2ensite dev.domainhere.info.conf

Now Restart the Apache service and check the status,

systemctl restart apache2

systemctl status apache2

Enable Firewall:

ufw allow 80/tcp

ufw allow 443/tcp

Configuring Matomo

Now open the URL from your browser, this will redirect you to configuring the final parts of the Matomo installation.

https://dev.domainhere.info

Replace the dev.domainhere.info with the actual IP or domain configured on the server.

Input the Database details which was configured earlier. Follow the below steps:

images
images
images
images
images
images
images
images

Now you have successfully installed Matomo with LAMP Stack on Debian 12.

bookmark_borderHow to Install Docker On Debian 12

Hello,

In this week’s feature highlight, we look at How to Install Docker On Debian 12

What is docker?

Docker is basically a container engine that uses the Linux Kernel in order to create containers on top of an operating system. Which is used to create, deploy and run the applications.

Install Docker

Install the docker using the apt package manager.

apt install docker.io docker-compose

Start and enable the docker

systemctl enable --now docker

Check Docker service

systemctl status docker

Output:

root@vps:~# systemctl status docker
● docker.service - Docker Application Container Engine
     Loaded: loaded (/lib/systemd/system/docker.service; enabled; preset: enabl>
     Active: active (running) since Tue 2023-06-13 16:20:51 UTC; 20s ago
TriggeredBy: ● docker.socket
       Docs: https://docs.docker.com
   Main PID: 5345 (dockerd)
      Tasks: 8
     Memory: 28.0M
        CPU: 930ms
     CGroup: /system.slice/docker.service
             └─5345 /usr/sbin/dockerd -H fd:// --containerd=/run/containerd/con>

Create a group called docker,

groupadd docker

To add a user to the docker user group

usermod -aG docker $USER

If you want to add a different user, replace $USER with an existing username.

Check the docker version,

docker --version

Output:

root@vps:~# docker --version
Docker version 20.10.24+dfsg1, build 297e128

Test docker using the hello-world container.

docker run hello-world

Output:

root@vps:~# docker run hello-world

Hello from Docker!
This message shows that your installation appears to be working correctly.

To generate this message, Docker took the following steps:
 1. The Docker client contacted the Docker daemon.
 2. The Docker daemon pulled the "hello-world" image from the Docker Hub.
    (amd64)
 3. The Docker daemon created a new container from that image which runs the
    executable that produces the output you are currently reading.
 4. The Docker daemon streamed that output to the Docker client, which sent it
    to your terminal.

To try something more ambitious, you can run an Ubuntu container with:
 $ docker run -it ubuntu bash

Share images, automate workflows, and more with a free Docker ID:
 https://hub.docker.com/

For more examples and ideas, visit:
 https://docs.docker.com/get-started/

bookmark_borderControl Panel Mobile UI/UX Improvements

Hello,

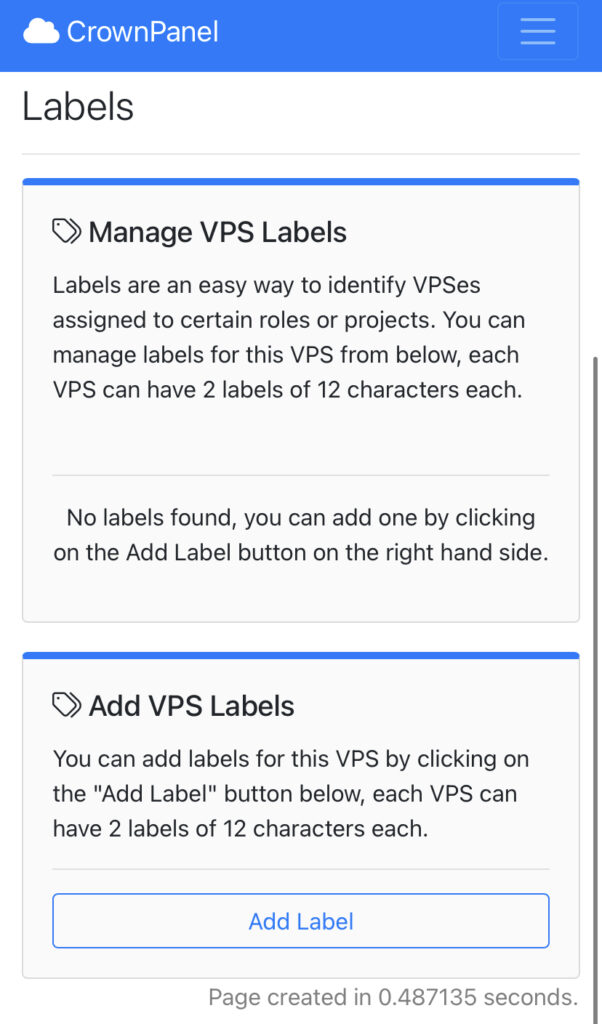
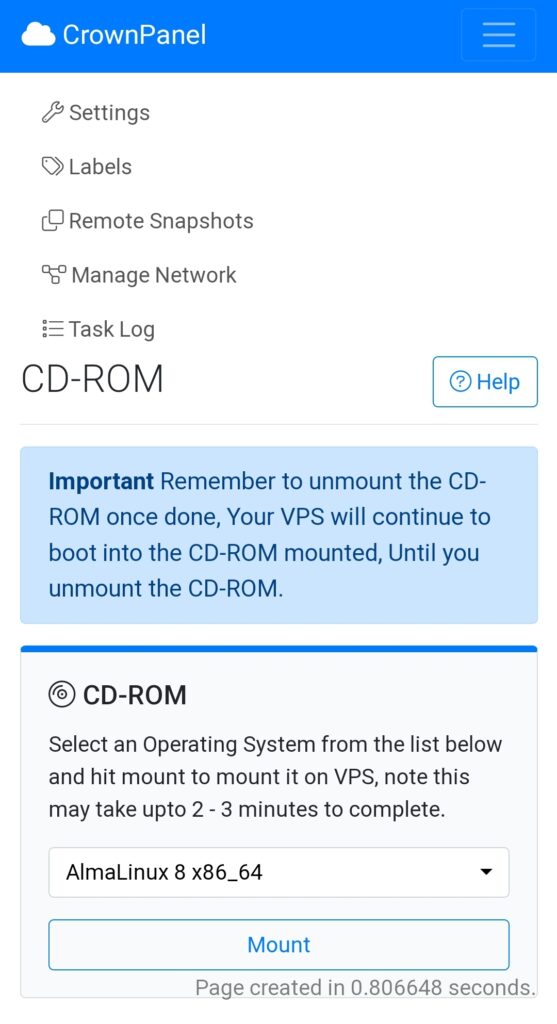
We’ve transformed our control panels mobile interface to enhance accessibility and functionality. The improvements encompass an array of enhancements, starting with fixes to navigation and general element design improvements on mobile devices,

Some of the improvements are with regards to button sizes and dropdowns, for example:

and various more improvements around the panel.

We hope these improvements make using our control panel easier and seamless.

Stay tuned for more updates.

-Team CrownCloud.