Hello,
In this week’s feature highlight, we look at How to Install Netdata on Ubuntu 22.10

Netdata is an Open Source real-time server monitoring tool. It collects real-time data like CPU usage, RAM usage, Load, SWAP usage, Bandwidth usage, Disk usage, etc.
Update the Server
Update the server using the following command.
apt update Downloading the Netdata package
Now you can proceed further to install the Netdata on the server. Run the following command on the server.
apt install netdata -yThe -y is use for the confirmation which will be prompted by the installer.
Netdata configuration file
We need a small change in the configuration file.
nano /etc/netdata/netdata.conf The configuration file will look like this
[global]
        run as user = netdata
        web files owner = root
        web files group = root
        # Netdata is not designed to be exposed to potentially hostile
        # networks. See https://github.com/netdata/netdata/issues/164
        bind socket to IP = 127.0.0.1
By default the bind socket to IP is set to 127.0.0.1. To access the dashboard using the IP address, you need to replace the 127.0.0.1 with your server IP address.
[global]
        run as user = netdata
        web files owner = root
        web files group = root
        # Netdata is not designed to be exposed to potentially hostile
        # networks. See https://github.com/netdata/netdata/issues/164
        bind socket to IP = <Enter your IP address here>
Now save the file and restart the netdata service using the following command.
systemctl restart netdata Firewall
If the firewall is enabled, then allow the port using the following command.
ufw allow 19999Netdata Dashboard
Enter the following URL on the browser to access the Netdata dashboard. By default netdata works on 19999 port.
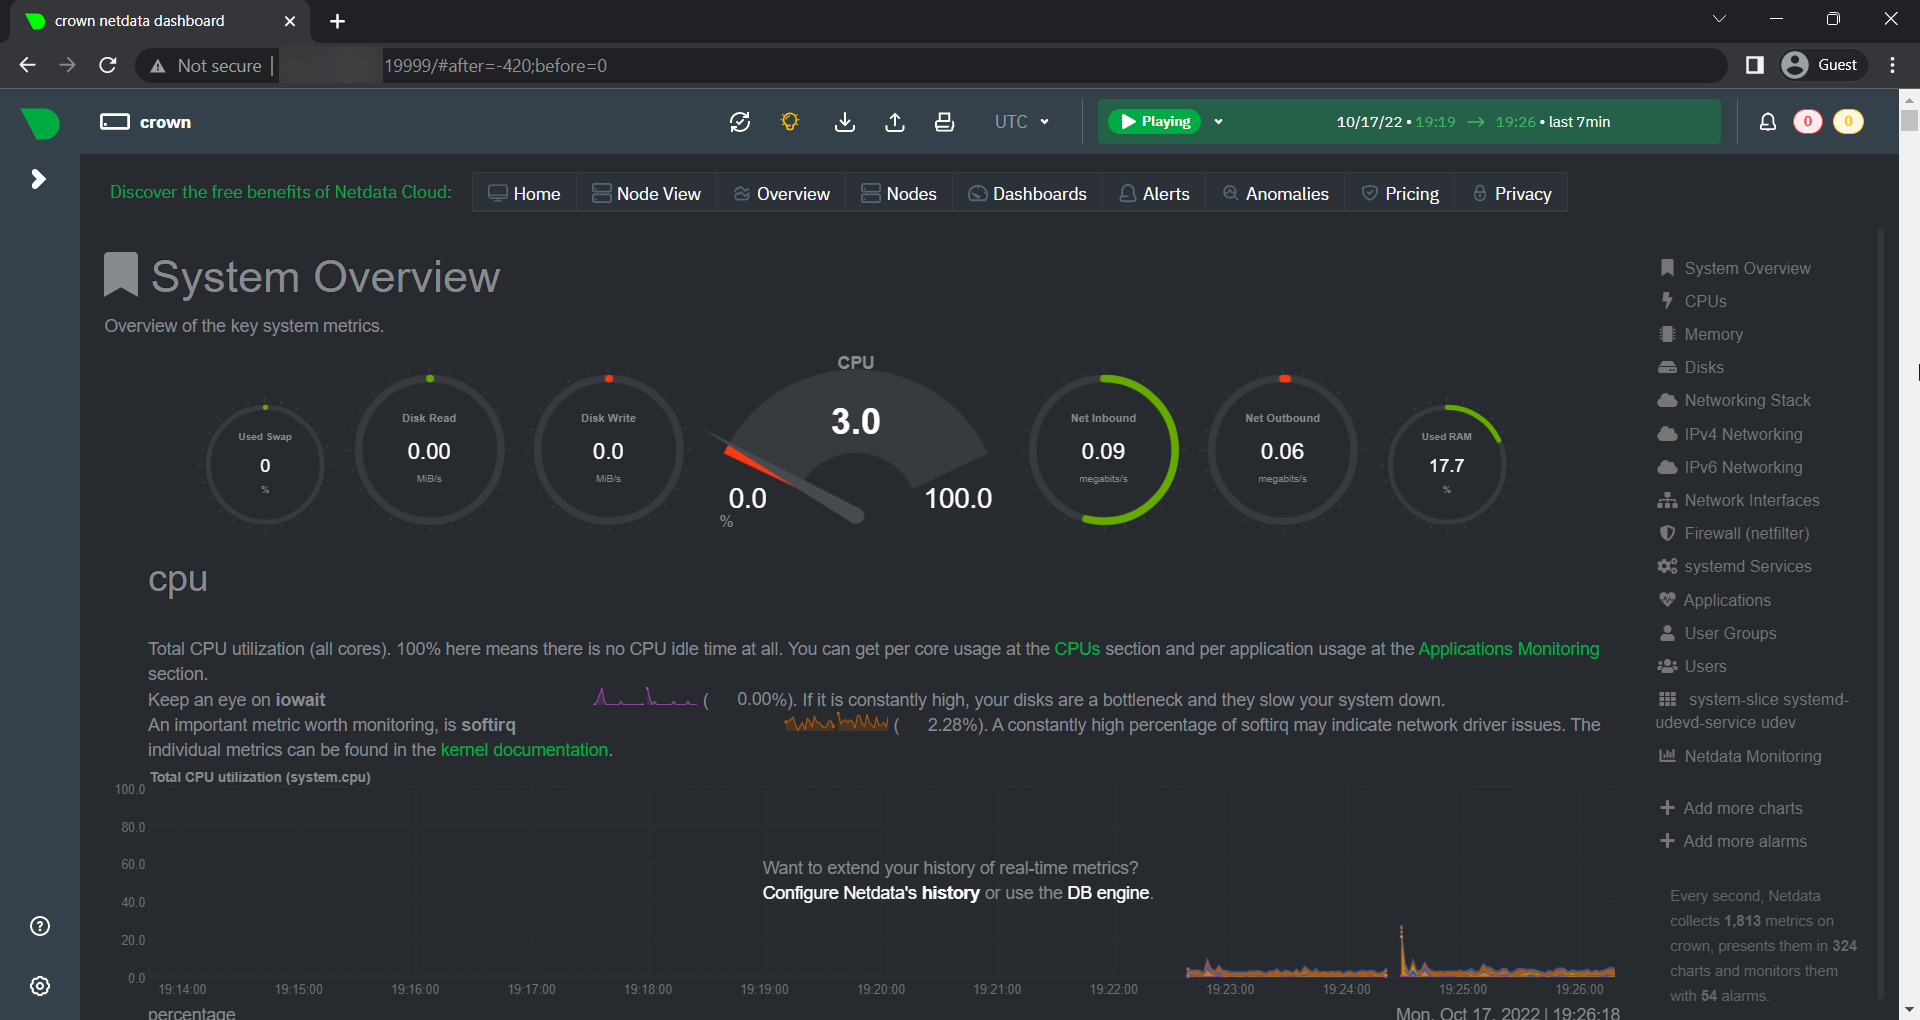
http://<Enter Your IP Here>:19999/The dashboard will look like this.